After years of attraction to, but avoidance of, tarte Tatin recipes, I finally gave in the other day so as to use my latest free food—old-fashioned, gritty pears from my neighbors’ tree.
 Angela & Michael have a prolific pear tree that had been heavy with fruit but was nearing the end of its production. I snagged an armful and invited Angela over for dessert to celebrate her stepdaughter’s birthday, since both Michael and the stepdaughter were out of town. For heaven knows what reason, I decided this was the day I’d do a tarte Tatin. A pear tarte Tatin, to be specific.
Getting ready
I started pulling cookbooks and scanning the recipes. Rustic! they said. Simple! they said. Hey! I’m a good cook, I said. How hard can it be (even if it did include one of my cooking fears, namely caramelizing sugar)?
At this stage, I probably should have reminded myself that the Tatin sisters who originated the dish were (a) French, (b) living in the 19th century and therefore had a different idea of what “simple” means and (c) professional cooks at their hotel.
However, I did not remind myself of that. Instead, I scanned the recipes in Bistro Cooking![]() and in the Gourmet Cookbook
and in the Gourmet Cookbook![]() and in Chez Panisse Menu Cookbook
and in Chez Panisse Menu Cookbook![]() and Mastering the Art of French Cooking
and Mastering the Art of French Cooking![]() . Based on that exercise, I decided that, sure, I could make a small tarte Tatin in my small iron skillet, top it with pastry and bake it in my toaster oven. Simple! Rustic!
. Based on that exercise, I decided that, sure, I could make a small tarte Tatin in my small iron skillet, top it with pastry and bake it in my toaster oven. Simple! Rustic!
Getting started
Things went well at first. After confusing myself with multiple recipes with distinctly different cooking methods, here’s what I did.
Individual tartes Tatin for two—the big picture
- 1 recipe caramelized pears (see below)
- 1 recipe pastry dough (see below)
- Spoon caramelized pears into two buttered 1-cup ramekins.
- Divide pastry into two halves, and roll out each into circles about 2 inches wider in diameter than ramekins. Place pastry on top of pears, and tuck pastry edges around pears at edge of dish.
- Bake at 400 degrees in toaster oven 30-40 minutes, or until pears are bubbly and pastry is nicely browned.
- Remove from oven and immediately top ramekin with heat-proof dessert plate. Invert, and smack ramekin to release pears. (If that fails, use a spoon.)
- Serve warm or at room temperature. Makes two generous servings.
So that was the plan. I proceeded with step 1, preparing the pears.
Carmelized pears for individual tartes Tatin
- 4 tablespoons butter
- 5 small-medium gritty pears, peeled, cored and cut into chunks (that’s the rustic part)
- 1/3 cup sugar
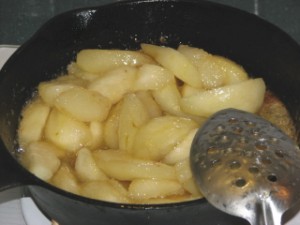
 Melt butter in well-seasoned 7-inch iron skillet (also rustic) over medium-high heat. (My skillet has a number “5” on the handle and measures 6 3/4 inches across the bottom exterior.)
- Add pears and sugar. Cook, and stir occasionally until sugar starts to color, then stir often (and increase the temp if you dare) until sugar and pears are a deep, golden brown. Watch to make sure pears and sugar don’t burn.
First success
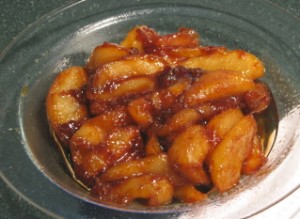
OMG! I did it! They’re gorgeous, those caramelized pears. OK, so the caramel started to break and I had some separated, clarified butter. Who cares? It will still taste great.
During the early part of the pears’ cooking, I made the pastry (recipe at the bottom). If you aren’t comfortable with pastry-making, you might want to make your dough before you start your pears.
Setbacks arise
Then things started going wrong. Just as I was about to lay the pastry on top of the pears, I compared the many cookbooks and came to unhappy conclusion that, unless I wanted to risk having pears glued to the bottom of my skillet, it probably would be wiser to transfer the pears to a fresh, buttered dish for baking. OK, that wouldn’t be as rustic, but I could manage it.
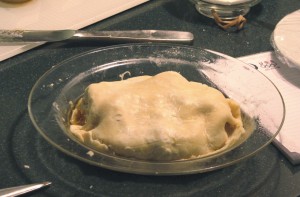
I therefore buttered a glass dish, spooned in the pears, laid the pastry over the top and tucked in the dough to the best of my ability.
Then I tried to put it in the toaster oven. Setback #2. In my directions-change, I failed to notice that the dish wouldn’t fit in the toaster oven. Damn. Still, I was determined not to turn on the big oven.
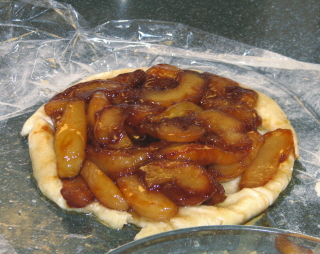
Out came the pears and pastry on a piece of plastic wrap! Out came two 1-cup ramekins from the cabinets, which I sprayed with nonstick stuff. In went the pears! Over went the now-somewhat-gooey pastry (since it had absorbed some of that separated butter), and tucked in, sort of. And, finally, in those babies went to the 400-degree toaster oven.
Sweeter for adversity?
When I pulled the tarts from the oven, they looked…pretty! Pretty enough, in fact, that I considered leaving them in the dishes so as not to worry about unmolding the things. After a minute’s pondering, I decided I owed it to myself to go all the way.
Thus, I grabbed a ramekin with mitt-covered hand, tapped it on the plate, smacked it on the bottom and finally spooned out a recalcitrant pear or two, which I placed inconspicuously on the tart.
Ta-da!
Proof is in the eating
By the time Angela arrived, the unmolded tarts awaited nothing but the eating. The kitchen showed no signs of duress. The cookbooks sat in their spots on the shelf. I had no ice cream or whipped cream or crème fraiche or sour cream to spoon on top. I did, however, have half-and-half. We drizzled a little over the top, and we ate.
Sound the trumpets! The taste was divine! The pastry unbelievably flaky and light! It was a miracle!
It was so good, in fact, that I’m sure I’ll do it again. Now that I kind of know what I’m doing, it might actually seem simple. And, who knows? Maybe someday I will dare to bake one in the skillet, and it might actually seem rustic.
As I ate it, though, I forgot that I made it unnecessarily complicated and that it didn’t seem rustic. You couldn’t even tell the pears were gritty. It was just good.
Oh, and Amanda? Hope you enjoyed your birthday as much as we did.
About the pastry
You can use any standard pie dough recipe or pâté brisée recipe, use as much as you need and freeze the rest. I tend to lose that sort of leftover in my freezer and therefore made a small quantity of dough that came together in a flash.
Pastry for individual tartes Tatin
- 2/3 cup all-purpose flour
- 1/4 teaspoon salt
- 1/4 cup shortening
- 2 1/2–3 teaspoons cold water
- Place flour, salt and shortening in bowl. Use pastry blender to cut shortening into flour until fat is thoroughly incorporated.
- Sprinkle 2 1/2 teaspoons water over. Toss flour mixture with fork to blend. (Don’t stir!) Add more water as necessary and toss. The aim is to moisten mixture enough so that it holds together when you form it into a ball.
- Cover with plastic wrap and let sit 5 minutes. You’re ready for step 4 in individual tartes Tatin recipe (above).


You’re brave. One of us is going to follow you. The non-baker is going to press the baker into making this. Your tart looks lovely.
Joanne // Oct 7, 2008 at 1:04 pm
Ohh, I love tarte Tatin! I made a pear one a few years ago in a skillet and it was divine…and yes, I did it right in the skillet, start to finish, stove to oven. (If you don’t tell someone something’s hard, she doesn’t know! :)
So, here’s the question. Why not turn on your oven? Was it too hot out?
Janet Majure // Oct 8, 2008 at 11:50 am
S&S—see Joanne’s comment!
Joanne—Thanks for that reassurance, both on the method and the note about something being hard. I will do it again, and in the pan! I didn’t want to turn on the oven because, yes, it was pretty warm, but also because I try not to use it for small things. Seems like a waste of electricity to me. Today, though, I’m trying to think of things to bake so I have an excuse to turn on the oven and warm the house up!
Elizabeth // Jan 3, 2009 at 3:29 pm
This looks wonderful. You’re ambitious for attempting the tartes Tatin. Way to persevere and improvise — looks like the end result was worth it.
Janet Majure // Jan 4, 2009 at 2:04 pm
Thanks, Elizabeth. It definitely was worth it. Good luck with your mashups, too!