foodperson.com

You are what you eat

foodperson.com header image 1

You can still fix soup, even after it’s done

January 12th, 2009 · Food preparation, recipes

Two celeries

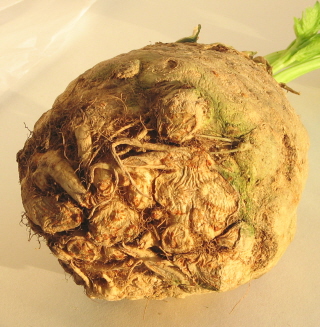
In an attempt not to get into the same-soups rut I created last year, I decided to make Double Celery Soup, which I hadn’t made for years and recalled being quite enthusiastic about. I stopped at the store when I was in transit from one spot to another and bought a celery root (or celeriac), which an ugly, brown, gnarled thing about the size of a large grapefruit with some celery-looking greenery coming out the top.

When I got home I realized that I didn’t have broth in the freezer nor any of the suggested herbs. I plunged ahead with the soup, from Patricia Wells’ Bistro Cooking. It turned out just OK—the broth was inadequate and I cut the vegetables too large for who-knows-what reason—but the story wasn’t over.

After eating the marginally acceptable soup for a couple of days, I decided to put my amazing leftover talents and my new immersion blender to use. The result: a completely satisfying soup! Yea.

The original soup

Here’s how it’s done, starting with the original soup, including the original instructions in case you want to make a proper Double Celery Soup.

Double Celery Soup

  • 1 medium celery root (about 1 pound), peeled and diced
  • 10 celery ribs, cubed
  • 3 leeks, trimmed, well rinsed and cut into thin rounds Mine: 1 medium onion, chopped
  • Bouquet garni: 1 large sprig of thyme, 3 imported bay leaves, several sprigs of parsley, tied with a string Mine: 1/4 teaspoon dried thyme leaves, 1 extra-large fresh bay leaf, zero parsley
  • 2 quarts chicken stock, preferably homemade Mine: 1 quart commercial organic chicken broth plus 1 quart water
  • Salt and freshly ground pepper
  • A handful of chopped fresh herbs for garnish: including chervil, chives and flat-leaf parsley Mine: none
  1. In a large saucepan, combine the celery root, celery, leeks and bouquet garni.
  2. Add the stock, and season gently with salt and pepper. Bring to a simmer over medium high heat. Simmer until the vegetables are soft, about 25 minutes. Adjust the seasonings.
  3. Pour into warmed shallow soup bowls. Sprinkle with the chopped herbs and serve immediately. Makes 6-8 servings.

Celeriac interior

The variation

This was so easy, it’s a shame I didn’t think of it sooner!

Step one: Puree soup with immersion blender. This step alone made an improvement over the original soup as I’d made it with overlarge chunks of celery root and celery. Heat soup to a simmer. I probably could have added just a pat of butter or dribble of olive oil and been satisfied at this stage. But I went a step further.

Step two: Chop a stalk of broccoli medium-fine to add the color that the fresh herbs would have provided. I also chopped a handful of leftover chicken. I added both to the simmering, pureed soup and let simmer 6 minutes, enough to heat the chicken through and tenderize the broccoli.

It still isn’t exactly pretty, but it smell great and looks more appealing than large chunks floating around in thin broth:

The lesson: When at first you don’t succeed, change it up a bit; you just might love the results. What do you have to lose?

→ 2 CommentsTags:·

Roundup: Local food in the spotlight

January 10th, 2009 · Roundup, local food

Food volunteers. The Douglas County Extension office is offering Master Food Volunteer classes starting Feb. 12. The cost is relatively modest ($75) for the 40-hour training, and 40 hours of volunteer service is required as part of the deal. If you have any experience with the classes, let us know what you thought. (Lawrence Journal-World) Meanwhile, the Douglas County site doesn’t seem to be working at this writing, but you can read more and get an application at the Shawnee County Extension site for the classes in Lawrence.

Growing in Emporia. With help from Lawrence local-food advocates, growers and others are working to boost local food production and consumption in and around Emporia. (Emporia Gazette)

Local food wiki. The Lawrence Sustainability Network‘s email newsletter brought my attention to the Kansas River Valley Local Food wiki. It doesn’t appear to be very active, and I’m not sure what information is there that isn’t available in better-established locations, such as Local Harvest. Any thoughts, anyone?

→ No CommentsTags:

Sweet potato muffins a nice use of excess tubers

January 7th, 2009 · Food preparation, recipes

Last we mentioned my end-of-season sweet potatoes, it was in a post complaining about the sad quality of supermarket pecans. Not to worry, though; they aren’t rotting in my basement. I did fear that might be their lot, however, if I didn’t do something with them since they weren’t “cured.”

What to do with pounds of potential sweet potato rot? Cook them first, of course. So one slow day, I washed them, boiled them, drained them, let them cool and peeled them, a very quick operation once thus boiled. There were a few unappealing spots, but no more, I’d say, than if I’d cooked them the week I bought them.

And what to do with pounds of cooked sweet potatoes? Well, some of them got eaten plain; they’re delectable, to my taste, in their natural state. The rest went into the freezer for further storage. A few of them have been thawed and eaten plain, too. Freezing clearly caused no harm.

I intend to make a sweet potato soup one of these days, but in the meantime, I used some recently for baking. After rejecting the online recipes I found (one called for 1 cup of butter in 1 dozen muffins, which seemed a little excessive), I turned to old faithful Joy of Cooking. Following is my adaptation of that recipe. Everyone loved these muffins. They were pretty and had a nice, not-too-sweet flavor.

Sweet potato muffins

  • 2 eggs, beaten
  • 3 tablespoons melted butter
  • 3/4 cup milk
  • 1 cup cold, mashed sweet potatoes
  • 1 3/4 cups unbleached all-purpose flour
  • 3/4 teaspoon salt
  • 1/2 cup sugar
  • 2 teaspoons baking powder
  • 1 teaspoon cinnamon
  • 1 teaspoon nutmeg
  • 1/2 cup chopped pecans (optional)
  1. Beat together eggs, butter, milk and sweet potatoes.
  2. In a separate bowl, mix flour, salt, sugar, baking powder, cinnamon, nutmeg and pecans.
  3. Add egg mixture to flour mixture. Mix briefly, just enough to moisten all the dry ingredients; lumps are OK. Batter will be quite thick.
  4. Spoon mixture into well-greased muffin tins, filling each cup 2/3 full. Bake in 400-degree oven for 25 minutes, or until toothpick inserted in center comes out clean. Let rest in tins 1 minute, then turn out onto wire rack to cool. Makes 1 dozen standard-size (about 3-inch diameter) muffins.

They’re good plain, with butter or, if you’ve got a sweet tooth, with honey or maple syrup. They’re great warm, but fine at room temp too.

By the way, you can also make these with 1 cup pumpkin instead of sweet potatoes (and in a brain lapse I gave the photo a pumpkin file name, but you’re seeing a sweet potato product). Joy also suggested 2 teaspoons grated orange rind as an optional addition. I haven’t tried that, but I’m betting it would be an excellent option.

What do you do with extra sweet potatoes?

→ 2 CommentsTags:··

Slow-fermented whole-grain bread a puzzler

January 2nd, 2009 · Food preparation, local food, recipes

My first venture into making artisanal (ha!) style whole-wheat bread has been…interesting.

Here’s the deal: I have a favorite 100 percent whole-wheat bread, from Farm to Market Bread Co., that I like to use for sandwiches. It’s tasty, has a nice texture and is local, more or less. (It’s from Kansas City, about 40 miles down the road.) It’s also $5.50 per one-pound loaf and is cruelly proportioned such that two slices seem like too much bread and one slice doesn’t seem like quite enough. Hence, I’d be pleased if I could make a satisfactory loaf.

My all-whole-grain loaf

Making it myself

I’ve been thinking for a while it would nice to be able to make a good, all-whole-grain bread myself, but I hadn’t seen any appealing recipes until I read Mark Bittman’s column on whole-grain bread. The column talks primarily about a quicker loaf in a previous column but provides instruction for a no-knead version more like baker Jim Lahey’s. Those are the instructions I followed. At least I think that’s what I did, as Bittman’s slow-fermentation instructions are given as sort of an aside.

In any case, here is what I did, in words and pictures. If anyone out there has made this recipe, I hope you’ll let me know if I did it right. Lacking experience with this kind of loaf, I’m not totally clear on whether I got the expected results.

Not-so-fast no-knead whole wheat bread

  • 2 cups whole wheat flour (local!)
  • 1/2 cup whole rye flour
  • 1/2 cup coarse cornmeal (mine was regular old cornmeal)
  • 1/2 teaspoon instant yeast
  • 1 1/2 cups water
  • 1 1/2 teaspoons salt
  • Oil as needed

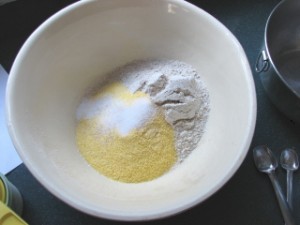
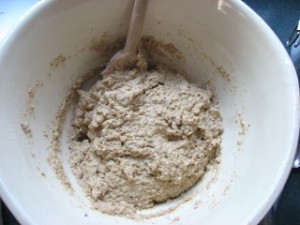
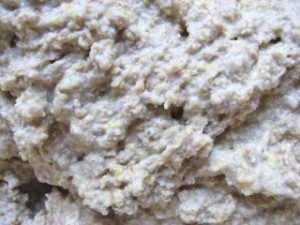
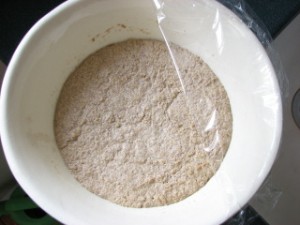
1. Combine flours, cornmeal, yeast and salt in a large bowl. Add water and stir until blended; dough will be shaggy. That’s what Bittman said, “shaggy.” What the heck does that mean? Beats me. I can tell you, however, the mixture comes together in a snap and has a rough texture, as perhaps you can see in the photos.

dry ingredients

“shaggy” mixture

dough up close

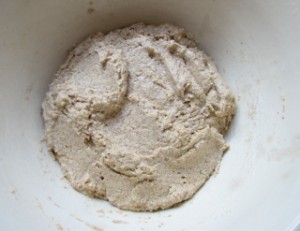
2. Cover bowl with plastic wrap. Let dough rest about 24 hours at warm room temperature, about 70 degrees. Finding a spot that warm in my house was the biggest challenge, but I discovered one spot near the middle of the house that kind of traps warm air behind a door. Yea! Remarkably enough, this curious mixture did rise.

smoothed over before “rest”

risen…more than is obvious

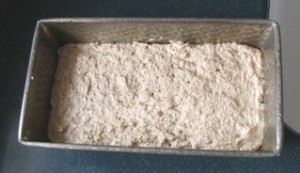
3. Oil an 8- by 4-inch loaf pan. Turn dough into pan and press to the edges. (The original instructions have you shape it into a rectangle before placing it in pan. My dough was far too soft to do so. You’re also supposed to oil the top; I forgot.) Cover with plastic wrap, and let rest 2 hours or more.

ready to bake

4. Bake bread at 350 degrees for 50-55 minutes, or until loaf reaches an internal temperature of 210 degrees. I used a thermometer, as the bread didn’t look promising after the originally specified 45 minutes’ baking time. Mine came out of the oven at 53 minutes, although it may still have been a little shy of 210 degrees.

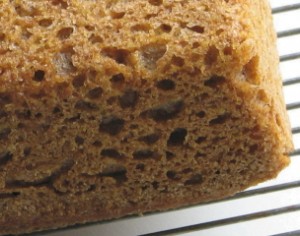
5. Remove bread from pan and cool on a rack. Bittman said a nonstick pan works well. Might be a good idea. I don’t have a nonstick pan of the specified size, and it took a little work—knife around the edge and several good whacks—to dislodge the bread. Makes 1 loaf.

holey bottom

The final result

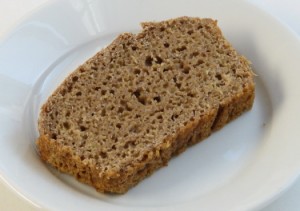
The bread is quite different from any yeast bread I can recall eating. The texture is fairly coarse and the middle is oddly moist—not gummy, but not far from it. It slices well.

a slice

Bittman says this bread can sit “for days” at room temp wrapped in a kitchen towel. Mine did, but before it developed the moisture content, as well as the density and appearance, of a brick I cut what was left into a couple of hunks and put them in the freezer. It also freezes and thaws well.

Again?

I’ll probably try it again, just to see if I get different results. I might add a tablespoon of honey or something to boost the flavor a bit. I gather that the loaf photographed at the link above is the quick version of this bread, which includes more yeast and shorter rising times. I don’t know if that explains the apparent finer crumb he got, based on the NYT photo.

In any case, I’d love to hear from anybody who tries this recipe. It truly could not be simpler, but I’m not sure that I might not be happier with a loaf that requires more effort and yields a finer texture. That may be the ticket with the recipe he provides for All Whole Wheat Sandwich bread, whose ingredients include added gluten, sweetener and milk.

→ 16 CommentsTags:·

Late-breaking black-eyed peas recipe!

December 31st, 2008 · recipes

Sorry to be so last-minute on black-eyed peas for New Year’s and New Year’s Eve! I have to admit eating black-eyed peas has never been my family’s tradition, despite my dad’s Southern roots. Nevertheless, I like black-eyed peas, especially Edna Lewis‘s Black-Eyed Peas with Onions, Garlic and Tomato. Much tastier than most Hoppin’ John I’ve had.

So, with the minutes counting, here’s a black-eyed peas recipe based on Lewis’s to celebrate the new year.

Black-eyed peas with onions, garlic and tomato

  • 1 cup dried black-eyed peas
  • 4 cups water
  • 1/3 cup olive oil
  • 1 medium onion, chopped
  • 1 clove garlic, minced
  • 1 (15-ounce) can diced tomatoes
  • 3/4 teaspoon salt
  • 1/2 teaspoon ground black pepper
  • 2 tablespoons fresh minced parsley
  1. Rinse peas and put in pot with water. Bring to boil, reduce heat and simmer till tender, 30-45 minutes. Drain.
  2. Heat oil in skillet. Add onion and garlic; saute 1 minute. Add tomatoes. Cook till onion and garlic are soft.
  3. Stir in peas, salt and pepper; simmer 10 minutes longer to blend flavors. Adjust seasoning.
  4. Stir in parsley and serve. Good hot or at room temperature.

→ 2 CommentsTags:

Take a peek at new website; tell me what you think

December 29th, 2008 · General, Healthy eating

On the off chance you’ve been dying to know what I’ve been up to, besides holiday-related stuff, I think I’m ready to show you now. As I think I previously mentioned, I have been working to develop a new site from which I’m hoping to make a little money. It’s called Homecooking Revival, and I hope you’ll take a look.

As you know, I love food and enjoy cooking, but, scintillating though my writing here may be, I’m not expecting to get huge amounts of traffic, which can lead to income, which I wouldn’t mind getting. Plus, as much as I love an audience, I’m not sure how helpful Foodperson.com is, and I like being helpful.

The idea

Hence, Homecooking Revival. My hope is to develop, in time, one location where a novice home cook can go to get information on how to cook good, real food, mostly everyday food. Lord knows the Web is brimming with food sites. I figure, though, cooking newbies aren’t going to be as interested in recipe sites and I-love-to-cook sites, which seem to be the mainstay of online cooking sites.

Anyway, take a look, please, and let me know what you think about the look, the feel, the content. You can let me know by commenting on the site, commenting here or sending me a private message via the contact form on this site or on Homecooking Revival.

About Foodperson.com

I have every expectation to continue to post here. I like the personal aspect of it and being able to bring my questions and experiments to readers. Maybe I’ll post a little less often. I don’t know; we’ll see. I do have a couple of posts (with photos) in my back pocket, though, just waiting for me to get around to writing them. Stand by, and we’ll see where this new venture leads.

→ 6 CommentsTags: